Connect your Shopify store to Leapd
Shopify doesn’t have a simple password for outside services, so you create a small private app for your store. It can only edit your blog content, and it takes about three minutes. Use the Shopify account that owns the store.
- 1
Open App development in your Shopify admin
Go to https://admin.shopify.com/settings/apps/development
It opens the store you’re logged into. You can also get there in your Shopify admin from Settings → Apps → App development.
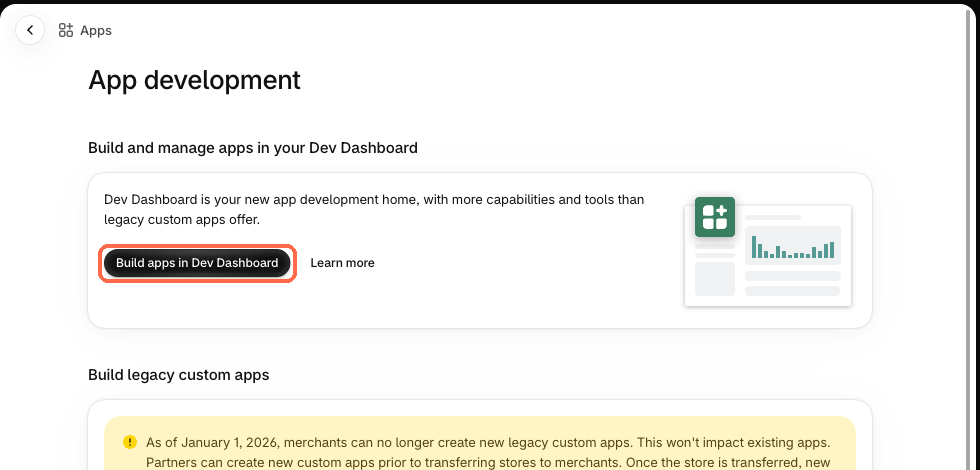
Click Build apps in Dev Dashboard.
- 2
Open Apps
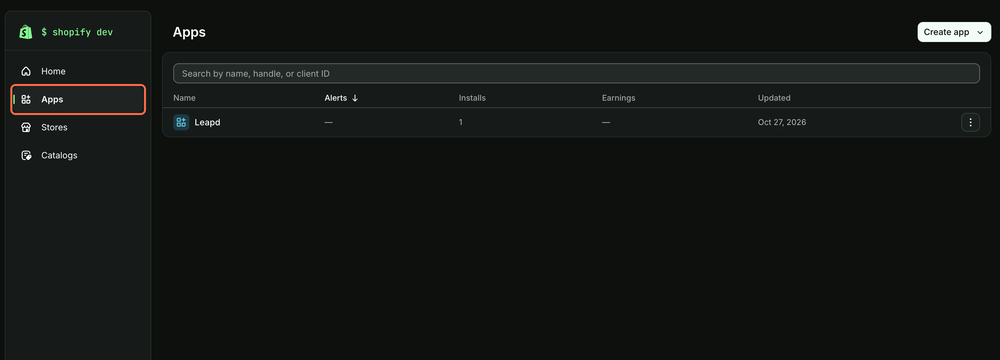
The Dev Dashboard opens. Click Apps in the menu on the left.
- 3
Create the app
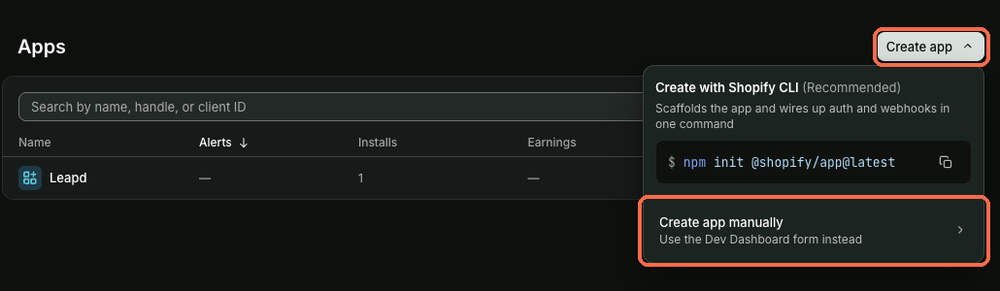
Click Create app at the top right, then Create app manually.
- 4
Name it and give it blog access
Type Leapd as the app name. Scroll to Scopes and type
write_content. Leave everything else as it is, then click Create app.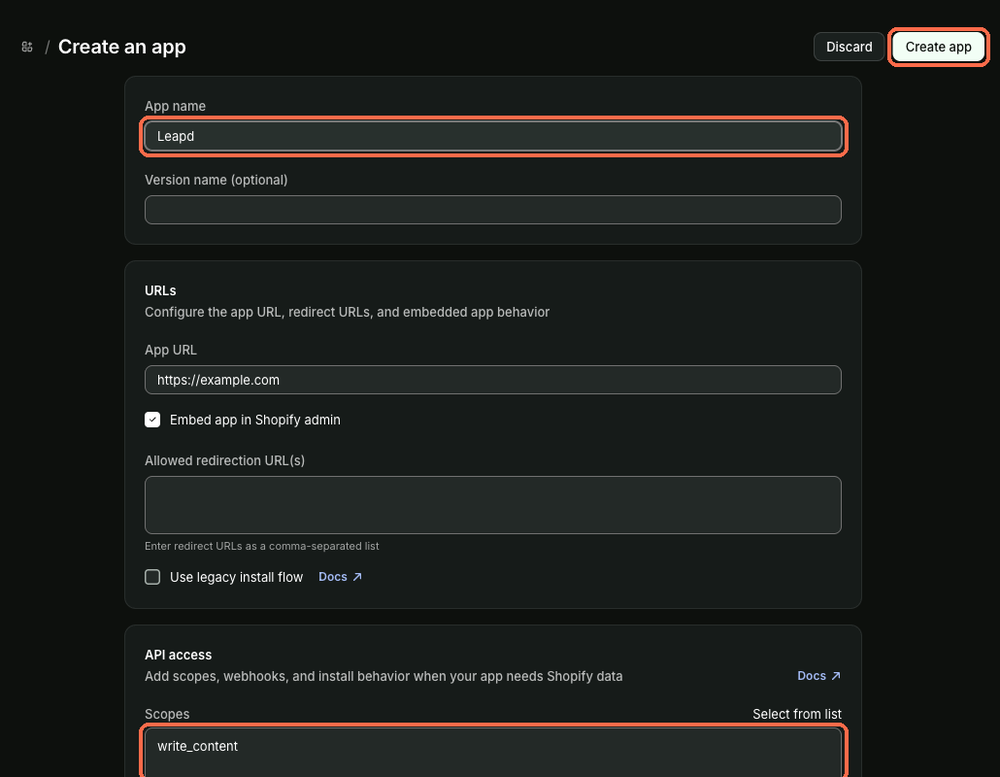
- 5
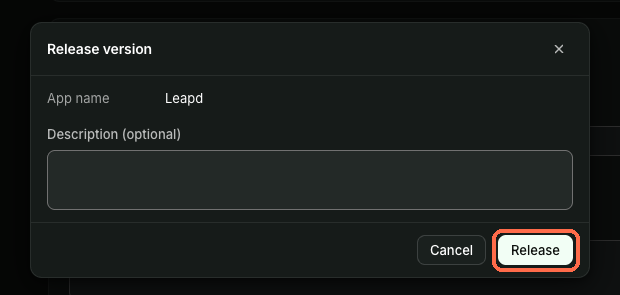
Release it
A box opens. Click Release.
- 6
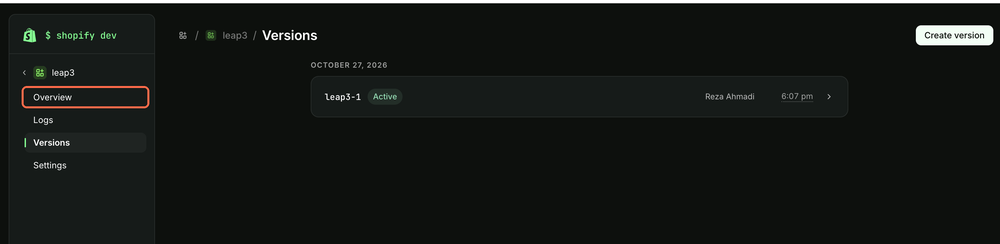
Open the app
You land on the Versions page. Click Overview in the menu on the left.
- 7
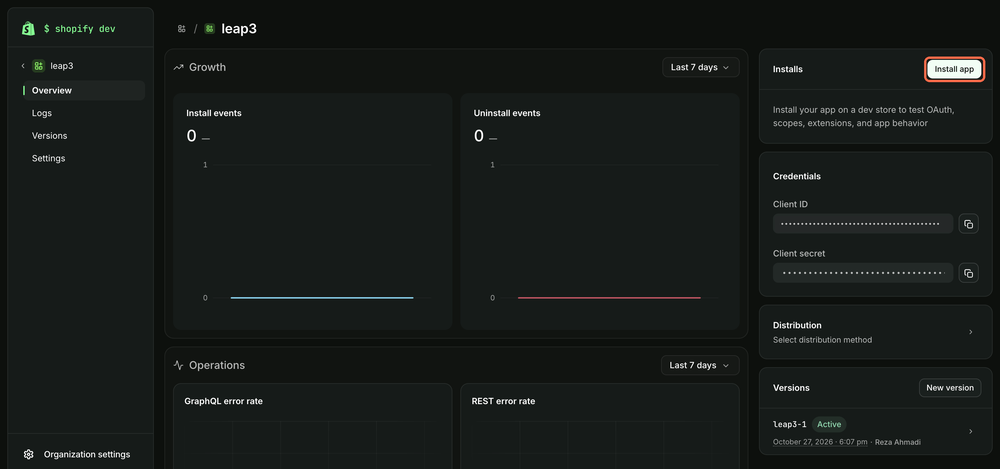
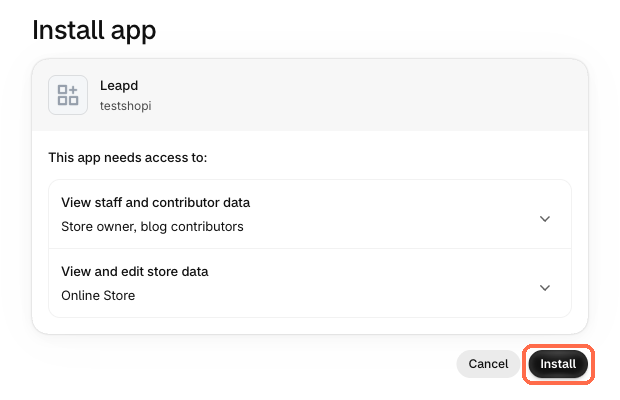
Install it on your store
On the app’s page, click Install app at the top right (if you don’t see it, make the browser window wider). Pick your store, then click Install.
- 8
Ignore the example.com page
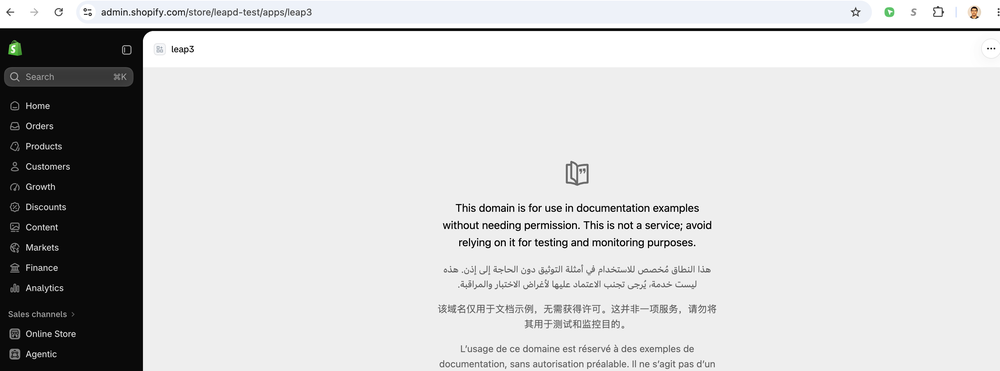
After installing, Shopify opens the app in your admin and shows a page that says “This domain is for use in documentation examples”. That’s normal: the app has no page of its own. Leave it and go back to the Dev Dashboard tab.
- 9
Copy the Client ID and Client secret
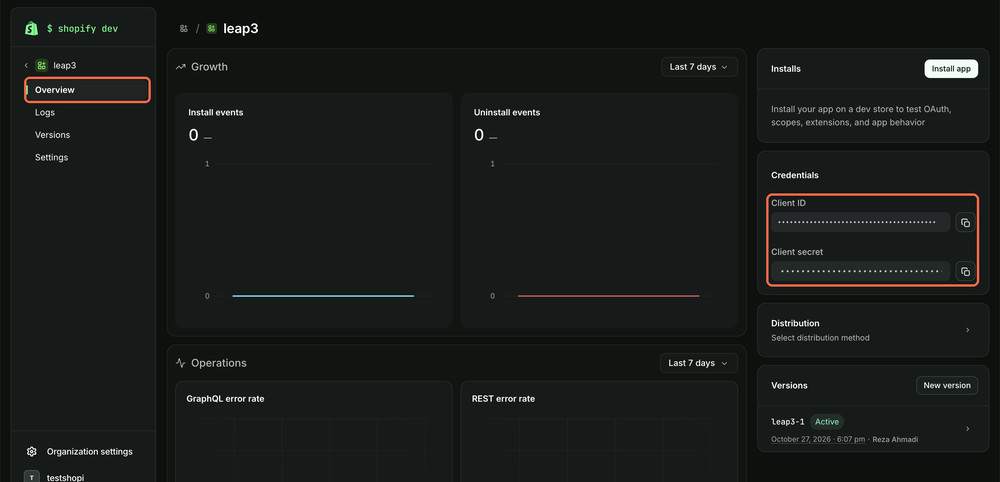
In the Dev Dashboard tab, click Overview in the menu on the left. Under Credentials, use the copy buttons next to Client ID and Client secret.
- 10
Connect it in Leapd
Go back to Leapd. Open Automations → Publish Articles and click Set up next to your website (or click Publish on any article).
Under Website platform, pick Shopify. Fill in your Store address (your store’s domain, or its
.myshopify.comaddress from Settings → Domains in Shopify), then paste the Client ID and Client secret and click Save and connect. Leapd checks the connection before saving.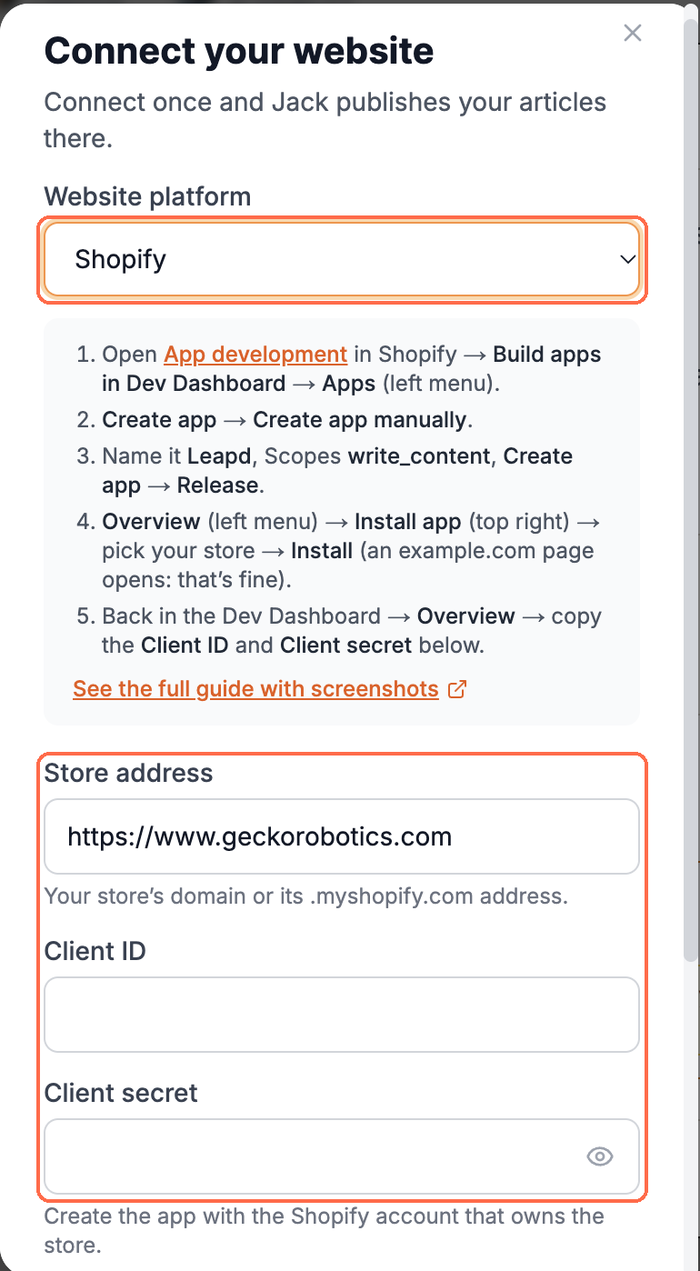
Once connected, Leapd publishes each article to your store’s blog, at your own domain, for example yourstore.com/blogs/news/article-name. Publishing again updates the same article.